Wednesday, 30 July 2014

Feta & Tomato Stuffed Bell Peppers

I love peppers. I try and shoehorn them into as many dishes as i can get away with - sweet & crunchy deliciousness. However, they're usually just another ingredient in a larger recipe. This won't do at all - time to make the peppers the star! These are ideal summer fayre as despite being cooked, they're light, so they can be used as a side dish as well as the main dish.

You can use whatever cheese you like, you don't have to use Feta. Mozzarella & Cheddar work equally well. Again, this recipe involves peeled tomatoes, so just refer back to the tutorial a few posts back if you've run out already.

You will need the following ingredients:

2 large peeled Tomatoes
2 large whole Red Bell Peppers
125g of Feta Cheese
Handful of fresh Basil
4 crushed Garlic Cloves
Olive Oil

Utensils Needed:

Chopping Board
Chef's Knife
Pyrex or Ceramic Dish


Pre-heat your oven to Gas Mark 3 (350° Fahrenheit / 180° Celsius). Cleave the peppers lengthwise, keeping the stalk in place. Sharpen your knife beforehand, the stalks can be quite tough.


Remove the seeds and as much of the white bits as possible while retaining the stalk, as shown below.


Take your peeled tomatos, slice them into quarters, discarding the stalks in the process. Each pepper half will hold two quarters.


Place all the newly tomato stuffed pepper halves into your oven dish. To keep the peppers level in the dish, use small balls of tinfoil to 'wedge' the peppers into place.


Mix the crushed garlic with two tablespoons of olive oil.


Take your handful of basil...


...and go mad with a knife! If you don't have any fresh basil, dried will work perfectly well, just be careful not to use too much of it.
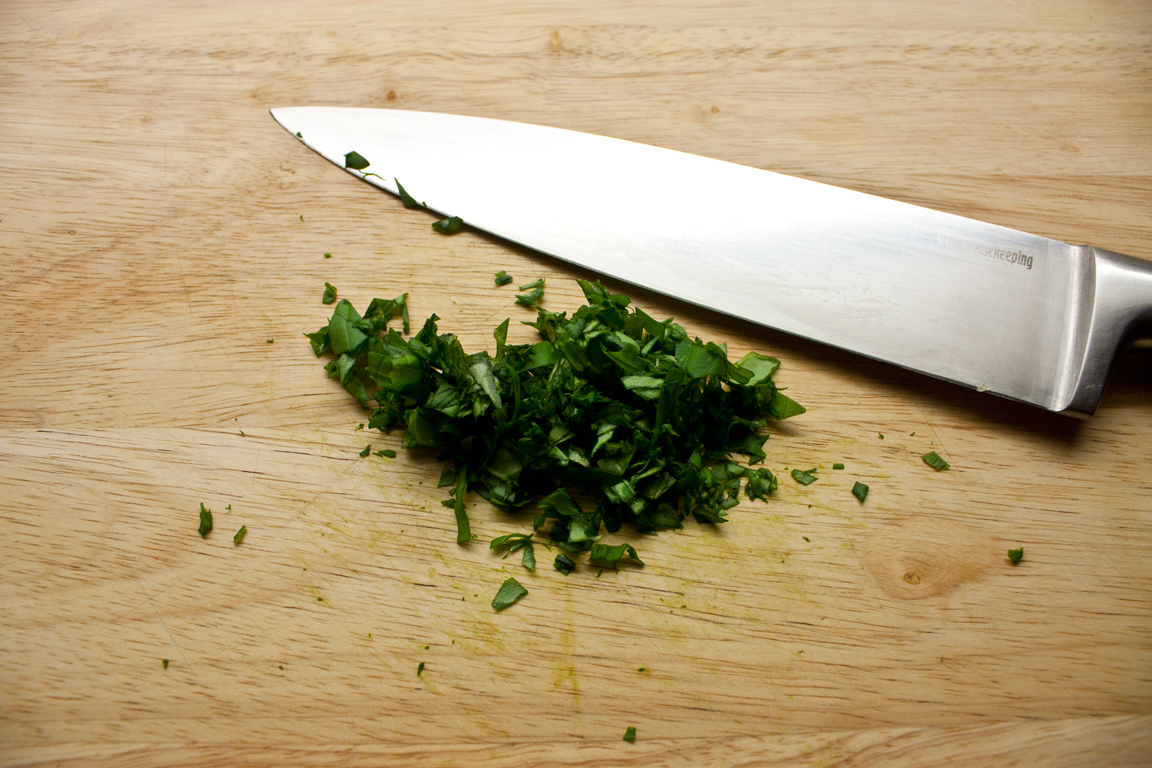

Cube the feta and divide it between the peppers. Then drizzle the garlic & olive oil over the feta, and finally sprinkle liberally with the basil.


Place in the top of the oven for at least 20 minutes. To get them out of the dish afterwards, you may find a shallow serving spoon rather handy - i've tried tongs before and it just ends up with a mess!


These peppers are brilliant served with some grilled chicken on a bed of basmati rice, or just on their own as a quick lunch :)

Sunday, 27 July 2014

Perfect Salsa

What better to go with your perfect Guacamole, than a nice bowl of Perfect Salsa? :D

Okay, seriously, i've seen the horrifying 'salsa' that gets sold in the shops and i've even dared to taste it. It's definitely not what salsa is supposed to taste like, it's the wrong consistency and if i could sum it up in one word, it'd be 'Ew.'

If you're making any kind of mexican food, be it a burrito or fajita or even just feel like using it as a side to another dish, this is what salsa is supposed to be. Fair warning - it is time consuming to make but i hope that you'll think it's worth it once you taste the end result.

You will need the following ingredients:

6 large peeled Tomatoes
Bunch of Spring Onions
1 whole Lime
1 large green Chilli (or 3 small ones)
Handful of fresh Coriander

Utensils Needed:

Chopping Board
Chef's Knife
Two Bowls


Trim the spring onions to about 3" in length.


Chop as finely as you can and add to the bowl.


Cut the chillies lengthwise and de-seed them.


Slice lengthwise and chop as finely as you can again - you don't want to be stuck eating a large chunk of green chilli, unless you have an asbestos face!


Now comes the messy part. De-seeding your tomatoes. As with the Guacamole recipe, reduce your peeled tomato to the point shown below. Repeat for the remaining 5 tomatoes.


Once de-seeded, rinse them in a bowl of cold water.


Slice each segment lengthwise and chop into 1cm wide chunks.


Add to the bowl with your handful of chopped coriander, a big pinch of salt, and the juice of the lime.


Simply mix through with a spoon and voila - Salsa!


It's ready to use as it is, but rather than a burrito or fajita, i decided to serve mine with some Salmon Fishcakes for a low-fat, healthy dinner :)

Perfect Guacamole

I realise 'perfect' is just my opinion, but hopefully once you've made this, you'll agree with me! It's so much better than any of that horrible green ooze you get in a jar in the supermarket that tastes nothing like Avocado. It's not hard to make at all, and if you have a food processor, takes less than 10 minutes.

You will need the following ingredients:

4 large Avocado's
Bunch of Spring Onions (Scallions, for you Americans...)
1 large peeled Tomato
1 large green chilli (or 3 small ones, as pictured)
1 whole lime
Handful of fresh Coriander (Cilantro)
Cayenne Pepper
Ground Cumin
2 cloves of Garlic (optional)

Utensils Needed:

Chopping Board
Chef's Knife
Bowl
Food Processor (if you have one, if not, use a fork and a bowl)


I'm aware the garlic isn't shown in the above picture, but as mentioned in the ingredients list, it's optional, and i didn't have any left!


Regardless of whether you're using a food processor or not, you want to take your spring onions, chillies and tomato and prepare them. Split open and deseed the chillies, crop the spring onions and peel off the outer layer if it's a little manky. With the tomato, cut through the middle, use a 'v' groove to remove the stalk, cut in half again and de-seed it. If adding garlic, crush at least 2 cloves and add it at this stage.

At this point if you're using a bowl and a fork, chop all three up as fine as you can with the knife, and add to your mixing bowl with your handful of chopped coriander. As i'm using a food processor, i added it, and pulsed it a few times to reduce it all to what is shown below.


Split open your avocado's, remove the stone, and peel off the skin. Add the flesh to your mixing bowl/food processor with the rest of the ingredients. Half a lime is usually enough for three avocado's, but for four, you want to use a whole one. Add a large pinch of salt, a heaped teaspoon of ground cumin and half a teaspoon of cayenne pepper.


Consistency is entirely up to you, but i prefer my guacamole with plenty of nice chunks in it. I use the 'pulse' function on my food processor a few times to get it looking like below.


There - that wasn't so hard now, was it? Now go and grab yourself a bag of tortilla chips, or add it to a burrito/fajita :)

Tutorial - How to remove the skin from Tomatoes

There are often times in recipes that call for peeled tomatoes, and i have a few myself ready to put up. It might sound pretty daunting, but actually it's pretty simple, you just have to pay attention to the timing. It's best to do them in large batches due to the fact it can seem like a bit of a chore.

You will need the following ingredients:

7 large vine tomatoes (you can use any tomato, but the smaller, the fiddlier!)

Utensils Needed:

Chopping Board
Chef's Knife
Large Saucepan
Large Bowl
Slotted Serving Spoon
As much Ice as you can get hold of


First off - 3/4 fill a large saucepan with water and get it upto a nice, rolling boil.


Check the tomatoes are firm - soft tomatoes will fall apart, so make sure they're as fresh as possible.


Score the tomatoes with a large 'X' on the underside with your knife. Try not to score the flesh too much if you can help it.


Now, this part is time critical and can be fiddly. Use the slotted spoon to put all of the tomatoes into the saucepan of boiling water, and count down 60 seconds. NO MORE THAN 60 SECONDS! Smaller tomatoes will need less time but never exceed 60 seconds regardless of the size of tomato.


Take the tomatoes out of the boiling water and plunge them straight into ice water. The colder the better. It stops the tomatoes from cooking, and makes it easier to remove the skin.

Leave them in the water for at least 5 minutes before peeling them. Start at the 'X' mark and the skin should come away with ease. The tomato will feel a little soft & slippery, so return it to the water to rinse off.

You should be left with a bowl of lovely skinned tomatoes, as shown below.

Saturday, 28 June 2014

Tzatziki

Okay, so this isn't exactly a meal, it's an accompaniment to many other sorts of food, typically mediterranean and middle eastern, but this goes well, i think, with the tandoori chicken recipe i posted a few weeks ago, particularly as it can use up the 250g of yoghurt that goes unused!

You will need the following ingredients:

Whole Cucumber
A Lemon
250g of Greek Yoghurt
Salt & Pepper
Garlic Paste
Olive Oil

Utensils Needed:

Large Ceramic Bowl
Chef's Knife
Peeler


First of all, take the cucumber and peel it. Yes, that's right, peel it. You don't need a lot of pressure on the peeler to remove the skin either. Once peeled, slice lengthways and scoop out the pulp/seeds with a teaspoon. slicing a 'V' groove here with the knife aids in seem removal. This is done to stop it from becoming too watery. You want to be left with the cucumber looking as it does below:


 Then, simply dice the cucumber into fairly sizeable chunks.


At this point, add the juice of half the lemon, a good grind of black pepper and a large pinch of salt (don't overdo the salt, though). Add a good heaped teaspoon of garlic paste (or crushed garlic if you prefer) and mix through thoroughly.


Mix in the 250g of yoghurt at this point. Make sure it's well mixed as possible.


Ta-da! Done. See? Pretty simple for a side dish, takes about 10 minutes to prepare. The recipe will scale as well, so if you do double the cucumber - double the yoghurt. It will keep in the fridge for a day, two at a push, so try not to make too much of it in one go.


Wednesday, 4 June 2014

Tandoori Chicken

If you like indian food, you may be familiar with tandoori chicken already. Contrary to popular belief, it's not at all difficult to make and doesn't need a lot of ingredients, either. This is perfect for summertime BBQ, served with salad or rice.

You will need the following ingredients:

1kg of Chicken Breast Fillets
250g of Natural Yoghurt
1tbsp of Tandoori Spice Mix
A Lemon
Salt

Utensils Needed:

Chef's Knife 
Plastic Chopping Board
Ceramic or Pyrex Dish
Grill Pan


Take the chicken breasts, and trim the fat & skin off them. score the top of  chicken about 1/3rd of the way down. If the breasts are more than about an inch thick, split them through the middle so they cook properly on the grill.


Once all the breasts are prepared, transfer them to a dish, ready to marinate. Juice the lemon and pout the lemon juice over the breasts. Grind a decent amount of salt over the top and set to one side whilst you prepare the marinade itself.


If you're using a 500g tub of yoghurt like i am here, decant half of it into a bowl and set the rest to one side. Take the tablespoon of tandoori spice and mix it into the yoghurt well.


See how the chicken breasts are going white? That's the proteins in the chicken denaturing - this makes the chicken tender and soft, and stops it from drying out under the grill.


Time to get your hands messy! Pour the yoghurt & spice over the chicken, and mix it through the chicken with your hands. Might be a good idea to have a tap running beforehand! Yes, i know you could use a fork or a spoon, but it takes longer and you never quite get the mix evenly spread out. At this point you should put it in the fridge for at least an hour, but even overnight, if you want to prepare this in advance.


If, like me, you're relegated to using an oven, or have no proper grill pan for the oven, you can use this trick - get a roasting tin and line it with tin foil. Suspend a wire cake rack over the top and ta-da, instant grill! Of course i'd rather use a proper BBQ or griddle for this, but i have to make do...


Spread the chicken over the grill, don't pack them in too tightly so that the edges get cooked through as well.


As for cooking, this will depend entirely on your grill/oven/bbq. Basically, you want the chicken to get to where it looks charred on one side, before you turn it over, so you'll need to keep an eye on it. As mentioned, it'll need to be cooked on both sides. If you need to add a little more of the marinade to the other side, there should be some left in the dish they marinated in.


Once off the grill, take the thickest piece and slice it diagonally to ensure it's cooked all the way through. It should be white all the way through the middle with NO pinkness. If there is any, put it back on the grill and grill for a further minute.


As you can see from this bit, it's all done nicely. Take them all off the grill and slice into large chunks, ready to serve. I serve mine typically with some boiled basmati rice for a simple, healthy dinner.


Sunday, 1 June 2014

Sausage & Lentil Casserole

I realise this is considered a dish for cold seasons, but it's taken me a while to find the SD card with the pictures on it! Yes, it's yet another one pot deal, what can i say - i like any excuse to break out my casserole dish!

It's entirely concocted of whatever was left in the store cupboards and the back of the fridge, and should easily feed three people. It's hearty, warming and packed full of flavour.

You will need the following ingredients:

1 large Brown or White Onion (any will do though, in a pinch)
2 Carrots
3 large Garlic Cloves
Pack of 8 Sausages, cooked & cold
200g of Mushrooms
100g of Unsmoked Back Bacon trimmed of fat.
1 can of Green Lentils in Water
2 Chicken stock cubes
Sage (Fresh or Dried)

Utensils Needed:

Chef's Knife
Chopping Board
Casserole Pot with Lid (Cast iron & Enamel are ideal)
Wooden Spoon
Measuring Jug


As with the Goulash below, the preparation for this is pretty simple. It's a one pot stew that takes maybe an hour, to an hour and a half to make. Pre-heat your oven to Gas Mark 2 (300° Fahrenheit / 150° Celsius) - we're going for a slow cook again.

Chop the garlic cloves up as fine as you can and leave to one side. Chop up the onion as coarse or as fine as you like, same with the carrots (although i find that thick chunks work best).

Put about a tablespoon of olive oil into the casserole dish and place on the smallest ring on the stove, at it's highest heat. Get it nice and hot, then add the garlic. Just as the garlic starts to brown, add the onions and turn the heat down low and put the lid on for about 5 minutes. The end result should look like this:


Now add the carrots and the sage. the amount of sage used is entirely up to you, feel free to leave it out entirely if you wish.


Trim the fat off the bacon if you haven't already, and cut into thin strips or chunks. We don't want to ruin this otherwise fairly lean dish by having chewy/fatty bits of bacon floating around in it!

Put the lid on for a minute, just to start the process - we don't want the bacon to fry off. 


Take the cooked sausages and add them at this point. Now i've chopped them into chunks here, so that they're easier to deal with on a spoon, but if you want to bring a fork to these proceedings, by all means feel free to add them whole.

Open the can of lentils and drain off the water. Rinse them with a little cold water first to get rid of some of the salt, then add them to the casserole dish as well.


Put the lid on and go and mix up 300ml of chicken stock, using your two stock cubes. I find that beef stock is a little too overpowering and takes over the taste almost entirely - which is fine if you're using beef sausages, but i'm presuming most people will use pork sausages.

Chop your mushrooms roughly, large chunks are ideal - don't do more than quarter them, they *will* shrink as they cook.

Now, add both to the casserole dish and put the lid on for about 5 minutes to get the whole lot up to the boil again.


Take the casserole dish off the stove, and put it in the oven. Rough guideline for cooking time is 30 to 40 minutes, anything more than an hour though, and the liquid will reduce too much and you'll start to get bits stuck to the bottom of the pan.


Ta-da! I know, it looks like an amorphous brown mess like that....so stick it in a bowl, and it'll look far more appetizing!


Serve with some nice thick sliced granary bread. I guarantee you'll feel full after eating even one bowlful :)